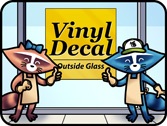
Install Vinyl Decal Film
These instructions list the tools and steps you’ll need to know how to apply Vinyl Decal Film on the Outside of a window. Following these “Vinyl Decal Film – Outside Glass” guidelines will ensure that your window graphics will last for a very long time, continuing to look extraordinary. Note: If you are applying your Vinyl Decal somewhere other than on a window, such as a car or door, you can still follow these steps.
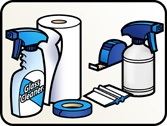 |
Tools Needed:Two people, MASKING tape (scotch tape may damage vinyl), squeegee, glass cleaner, and paper towels.Preparation:
Using glass cleaner, clean windows thoroughly and allow to dry. Read installation instructions carefully. Best installed when outside temperatures are over 65˚F with low humidity. |
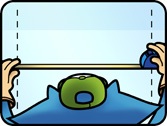 |
Step 1Use the tape measure to find the center point at which to place your vinyl decal. |
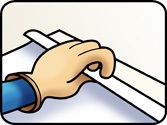 |
Step 2Starting from the top of the graphic, pull away 1” of the paper backing, exposing the adhesive. Fold down the exposed backing to prevent it from curling back up. |
 |
Step 3Place the exposed adhesive onto the window, graphics facing you, and squeegee over it slowly. DO NOT remove the remaining backing. Place a piece of masking tape across the top of the decal to hold it in place. |
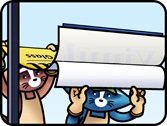 |
Step 4Have your partner lift the vinyl decal while you gently remove the protective backing, starting from the top and pulling downward about 6″. Make sure it stays taped to the window. |
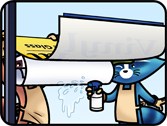 |
Step 5While your partner continues to lift the vinyl decal away from the window, spray the surface of the window liberally with water.Note: Skip this step if you are not applying your decal on a window. |
 |
Step 6Have your partner begin to lay the exposed portion of the vinyl decal down onto the window. Continue peeling away 6″ sections of the backing at a time as you squeegee from top to bottom. Once the graphic is fully-applied, squeegee from the center toward the outer edges to remove air bubbles.Tip: Cover the squeegee with a paper towel or soft cloth to prevent it from scratching the material. |
 |
Step 7Remove the masking tape and squeegee the top of the vinyl decal. Finish by wiping down the edges of the Vinyl Decal Film with a paper towel to remove excess moisture. |
 |
Step 8You’re done! Once the installation is complete, your vinyl decal will be secured to your window. |
 |
Perfecting Your Vinyl Decal:Most bubbles, (especially near the edges) can be pressed outward with a squeegee. If one cannot, use the corner of a razor blade or a sharp pin to puncture the bubble. Then, gently use your finger or a squeegee to press down the material and remove the air. Be careful and work slowly to avoid wrinkles.The wet installation will help to prevent streaking and bubbling. Once the material has had enough time to cure (up to 2 weeks), any streaks or bubbles should disappear. |